/
Manually Changing your Connected API Node
Manually Changing your Connected API Node
- Keegan Francis (Unlicensed)
Owned by Keegan Francis (Unlicensed)
Overview
This document will describe to you the process of changing the API node that your DAPP is connected to. In this example, the how-to is using screenshots from the peerplays-core-gui.
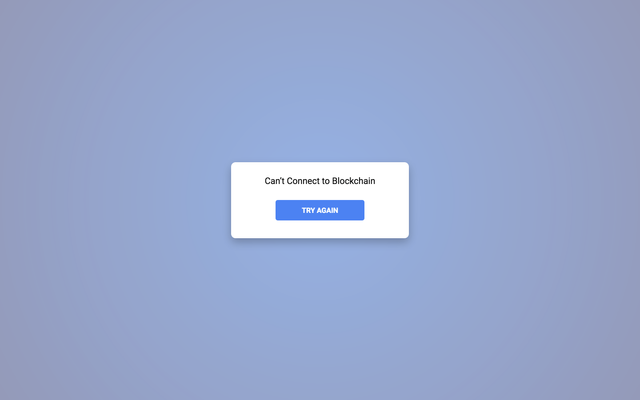
This document should be used when you get a "Can't Connect to Blockchain" error.
Warning
Incorrectly following this tutorial can result in your wallet operating incorrectly. If you follow the directions incorrectly, you will have to reset the wallet or uninstall/reinstall you wallet.
You will not lose your funds by editing the settings of your wallet. Your funds are stored safely and securely on your account that is stored on the blockchain.
Change the Connected Node
- Open the developer tools window on your DAPP
- Mac: alt-⌘-i
- Windows / Linux: F12 OR Ctrl + Shift + I
- Navigate to the applications tab
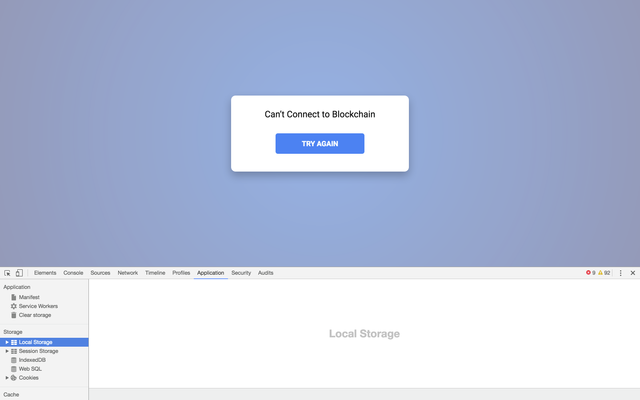
- Select "Local Storage" From the menu on the left
- Edit the setting (value) that corresponds with the key "__peerplays__settings_v3". The value should by default, equal "{"connection":"wss://api1.peerplays.download/ws"}"
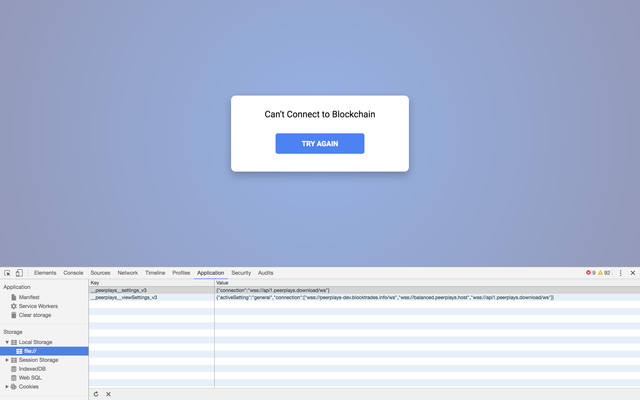
- Change the text highlighted in red to any one of the nodes located in the API Node (live) column of the Witness Node Connection Details document. For example "wss://pma.blockveritas.co:8089"
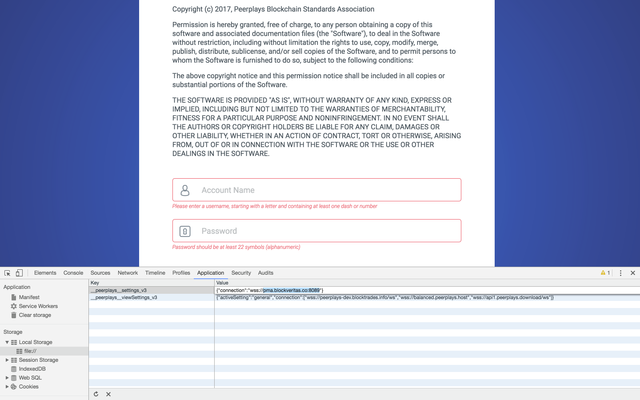
- Hit "Try Again" and you should be able to connect. If you are still unable to connect, please check the text that you pasted into the setting is correct or try a different Api Node (live) connection.
, multiple selections available,
Related content
Witness Node Connection Details
Witness Node Connection Details
More like this
16 Jan 2018: Witness Announcement
16 Jan 2018: Witness Announcement
More like this
5 Apr 2018: Witness Announcement
5 Apr 2018: Witness Announcement
More like this